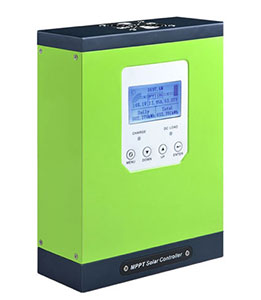
With the rapid development of the solar industry, solar charge controllers have now begun to spread all over the world, from our home power generation to street lighting, and finally to our transportation solar RV. The solar charge controller has its advantages and disadvantages. The advantage is that it is fully intelligent, fully automatic, and fully humanized. The disadvantage is that it is prone to failure. Buying a high-quality solar charge controller can reduce the occurrence of failures. Inverter.com has listed several reasons for the failure for you, hoping to help you.
Solar charge controller battery full soon and dead
Battery health issues
The battery may be damaged or have lost its capacity to hold a charge.
Solution:
- Check battery voltage: Use a multimeter to measure the resting voltage of the battery. A healthy 12V battery should have a resting voltage of around 12.6V when fully charged.
- Load test: Perform a load test to check the battery's capacity. This can often be done with a specialized battery load tester or by observing the voltage drop under a known load.

- Inspect for physical damage: Look for signs of swelling, leaks, or corrosion on the battery terminals.
- Replace battery: If the battery fails the above tests, it likely needs to be replaced.
Incorrect charge controller settings
The charge controller might be configured incorrectly for your battery type.
Solution:
- Verify settings: Check the settings on your solar charge controller to ensure they match the specifications for your battery type (e.g., AGM, gel, lithium).
- Adjust parameters: Make necessary adjustments to the float voltage, absorption voltage, and equalization settings according to the battery manufacturer's recommendations.
Solar panel issues
The solar panels may not be providing consistent power due to shading, dirt, or faults.
Solution:
- Inspect panels: Ensure the panels are clean and free from obstructions that could cause shading.
- Measure output: Use a multimeter to check the voltage and current output of the solar panels to ensure they are functioning correctly.
Solar charge controller load does not work.
- Check connections: Ensure all connections are secure and properly made. Check the wiring between the solar panels, charge controller, battery, and load.
- Verify battery voltage: Measure the battery voltage with a multimeter. If the voltage is too low, the charge controller might disable the load to protect the battery.
- Load settings: Check the charge controller settings to ensure the load is enabled. Some controllers have programmable load settings or timers that might need adjustment.
- Inspect for faults: Check for any visible damage to the charge controller, such as burnt components or melted wires. Look for error codes or indicator lights on the charge controller that might point to a specific issue.
- Load compatibility: Ensure the load is compatible with the charge controller. Verify that the load does not exceed the controller's capacity.
- Fuse or circuit breaker: Check if there is a blown fuse or tripped circuit breaker in the system. Replace or reset if necessary.
- Firmware update: If your charge controller has firmware that can be updated, check for any available updates that might address load issues.
- Battery condition: Ensure the battery is in good condition. A failing battery can cause various issues in the system.
- Temperature compensation: Some charge controllers have temperature compensation features. Ensure the temperature sensor is correctly placed and functioning.
- Reset the controller: Try resetting the charge controller to its factory settings and reconfigure it.
Inverter.com sells high quality solar charge controllers for charge control options.
